Peppermint sugar cookies

Posted on

Some days you just don’t feel like making everything from scratch or haven’t come across the perfect recipe. This is me when it comes to a sugar cookies recipe. I haven’t found “the one” just yet. So I cheat on this Peppermint sugar cookie recipe a bit. 

I opt to use a bag of sugar cookies mix and a can of vanilla frosting. This may shock some of my close friends and family that know how much I like cooking from scratch. Someday I’ll find a recipe I prefer, in the mean time I’m good with this. 

Ingredients:

  • Bag sugar cookies mix 
  • Egg (see bag for amount)
  • Oil or butter  (see bag for amount)
  • Container of vanilla frosting
  • Bag of peppermints 

Instructions:

Preheat oven according to cookie mix. 

Crush peppermints finely.

Mix cookie mix according to recipe on package. Once mixed well add in 1/4 cup of crushed peppermints and mix some more

Bake according to package on a parchment paper lined cookie sheet. 

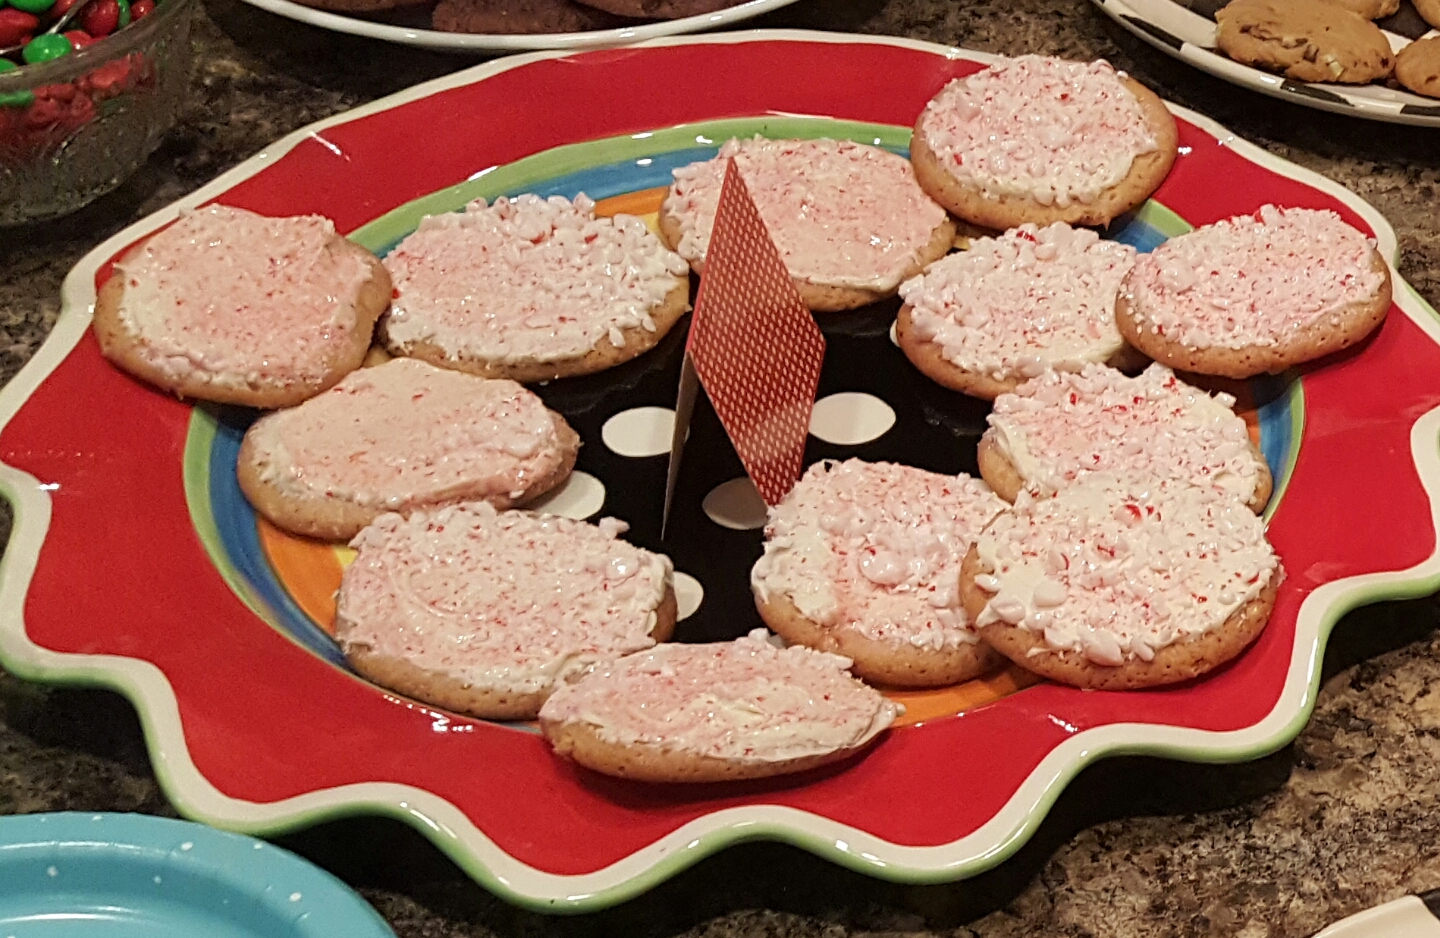
Once cool Frost each cookie and sprinkle a good coat of peppermints across the top of the frosting

Side notes:

For crushing the peppermints. You can do a few methods. You can cut to the chase and buy a bag of already crushed peppermints from your local grocery store on the baking isle. You can toss them in a zip lock bag and crush then with a rolling pin. My favorite method is to toss then in my food processor and pulse them until they are crushed.

Any brand of cookie dough will do. For the cookies I recently baked for our Christmas cookie exchange I used the Betty Crocker brand. Lowered my oven to 350° and baked for 14 minutes. 

Some don’t care to use parchment paper in baking. I don’t always use it. I do however make sure I do with this cookie. Sticky melted Peppermint stuck to a cookie sheet isn’t my idea of fun cleaning. 

After I Frost them, before storing I like to put them in the fridge for about an hour before stacking them to kind of set the frosting

If you find you have a lot of extra crushed Peppermint left over store in a zip lock bag or air tight container. Our family loves to throw a tsp of it in a hot cocoa or coffee. 

When storing, if stacking I like to put a sheet of wax paper between the layers.

If you like your cookie a little less sweet, skip the frosting and Peppermint on top.

Once again, I completely forgot to take a picture after I made these. So I cropped the best one I could find from our party.

FacebooktwitterpinterestFacebooktwitterpinterest

Butterfinger pudding cookie recipe 

Posted on

I usually make peanut butter cookies at Christmas time for my husband every year. I also make my Corn Pop’s butterfinger pie that my husband has come to love. So butterfinger cookies was a must try! 

Ingredients:

  • 1 stick (1/2 cup) unsalted butter, at room temp 
  • 3/4 light brown sugar
  • 1/4 cup sugar 
  • 3.4oz package sugar free vanilla pudding powder 
  • 2 eggs
  • 1 egg yolk
  • 1 tbsp vanilla extract 
  • 2 1/2 cups all purpose flour
  • 1 tsp baking soda 
  • 1/2 tsp salt
  • 10 oz butterfinger baking bits 

Instructions: 

Preheat oven to 325° (or 350°, I have to lower the temp on our oven)

Cream butter and sugar together until smooth

Add pudding mix, eggs, additional egg yolk, & vanilla

In a separate bowl, combine flour, baking soda, & salt 

Add dry ingredients to the wet ingredients about a 1/2 cup at a time until combined 

Fold in butterfinger baking bits

Use a cookie scoop onto a parchment paper lined baking sheet 

Bake for 13-15 minutes (mine took 15 minutes)

Cool on pan for 2 minutes before moving to cooling rack 

Side notes:

Yields approximately 4 dozen, mine made 46 small cookies 

Once again, I forgot to take a better picture 

FacebooktwitterpinterestFacebooktwitterpinterest

Espresso chocolate chip cookie recipe 

Posted on

Anyone that knows me knows I have a strong love for coffee! So when we decided on having a Christmas cookie exchange and I was sure we were going to have a hot cocoa and coffee bar as well as making a hot chocolate cookie, my husband suggested I bake some kind of coffee cookie. If you like coffee & chocolate, you’ll love this cookie!

Ingredients:

  • 3 cups all purpose flour 
  • 1 tsp salt
  • 1 tsp baking soda
  • 1 tsp vanilla extract
  • 1 cup light brown sugar 
  • 1 cup sugar
  • 2 sticks (1 cup) unsalted butter, at room temperature 
  • 2 large eggs
  • 12 oz bag mini chocolate chips
  • 1/4 cup instant espresso or coffee granules 
  • 1/4 cup whole coffee beans (optional)

Instructions:

In a large mixing bowl combine flour, salt, and baking soda. Set aside. 

In a mixer cream butter, brown sugar, sugar, & vanilla extract until fluffy. 

Add eggs one at a time.

Gradually add flour mixture until well incorporated. 

Stir in chocolate chips and coffee or espresso granules. 

Use a cookie scoop and drop on parchment paper lined cookie sheets. 

Bake at 350° (or 375°  I have to lower the temp for our oven) for 11-13 minutes (took our oven 13 minutes).

Optional: remove and promptly press a coffee bean in the center of each cookie. 

Side notes:

Depending on the size of your cookie scoop it can yield between 3-5 dozen. Mine made 59 cookies with a small scoop.

Can use 12 oz bag of regular size semi sweet chocolate chips, but the minis seem to spread through the cookie better.

I always have the best intention of taking a picture of them on a pretty plate after they cool, and well I get side tracked with a house full of kiddos:)

FacebooktwitterpinterestFacebooktwitterpinterest

Hot chocolate cookie recipe

Posted on

I love finding new recipes, however maybe it’s the New Orleans in me that makes me feel the need to put some kind of twist on it and make it my own, unless it’s a family recipe, those never get changed. So when I happened along this hot chocolate cookie recipe I knew I had to make it for our girls. 

Ingredients:

  • 12 oz bag semi sweet mini chocolate chips
  • 8 oz mini milk chocolate hershey bars
  • 12 marshmallows, halved
  • 1 1/2 cups all purpose flour 
  • 1 1/4 cups light brown sugar 
  • 1 stick (1/2 cup) unsalted butter, at room temp
  • 1/3 cup unsweetened cocoa powder
  • 3 large eggs 
  • 1 1/2 tsp vanilla extract
  • 1 1/2 tsp baking powder
  • 1/4 tsp salt

Instructions:

When ready, preheat oven to 300° (or 325°, I always have to lower our oven when baking)

The next step may be easier for you, since we opt to not have a microwave (if you do, like most “normal folks” by all means use it, ha ha), I apparently like adding work to my kitchen routines, so I do the double boiler method to melt the butter and mini chocolate chips until fully melted and combined. Then set to the side to cool a bit. 

In a mixer beat brown sugar, eggs, and vanilla extract until fully combined.

In a separate bowl, whisk together flour,  cocoa powder, baking powder, & salt. Set aside for now. 

Once melted chocolate & butter has cooled some (maybe 5-10 minutes) add to mixer with the already combined eggs, sugar, & vanilla. Mix until well combined. 

Gradually add dry ingredients to the mixer just until it’s well combined, will look similar to a thick brownie batter. 

Once mixed, cover dough tightly and refrigerate for about an hour or two. 

Use a small cookie scoop to line dough onto a parchment paper lined cookie sheet.

Use the back of a spoon or the palm of your hand to slightly flatten cookies. 

Bake for 9-11 minutes (ours took 11 minutes).

While baking, slice marshmallows in half and break each mini bar in half. 

Remove cookies from oven, and quickly press a piece of chocolate into the center of each cookie and top with a half of marshmallow. 

Return to oven and bake for another 5 minutes.

Remove and let cool. 

Side notes:

My family seems to have a hard time waiting for them to fully cool and prefers them warm. 

Recipe says it makes 2-3 dozen, I lean closer to it making 2 dozen so I make a double batch. 

After making these a few times, I discovered I prefer storing the dough to chill in a glass bread pan as it was easier to scoop out (which isn’t the easiest task with the thick cold mixture).

When storing if you’re going to stack them, it’s best to place a piece of wax paper between the layers so you don’t end up with a sticky mess from the marshmallows. 

This cookie quickly became a family favorite and will be an annual Christmas cookie for sure! 

Sadly, this is the only picture I’ve thought to take before they all got snagged! 

FacebooktwitterpinterestFacebooktwitterpinterest